


WordPress and React.js are two popular technologies that, when combined, can create powerful and flexible web applications. Pairing WordPress as a headless CMS with React.js for the frontend offers the best of both worlds: WordPress’s robust content management capabilities and React’s speed and interactivity. In this blog, we’ll walk you through the process of building a headless WordPress website using React.js.
What is a Headless WordPress Setup?
A headless WordPress setup separates the backend (WordPress) from the frontend (the part users interact with). Instead of using WordPress’s built-in themes and templates to display content, you fetch content via the WordPress REST API or GraphQL and use a custom frontend technology like React.js to display it.
This approach is ideal for developers who want complete control over the design and functionality of the frontend, along with the flexibility to create faster, more dynamic applications.
Why Use React.js for a Headless WordPress Website?
- Performance: React’s virtual DOM makes websites lightning-fast and highly responsive.
- Reusability: React components allow you to reuse code, making development more efficient.
- Flexibility: You can design custom layouts and user experiences that are not restricted by WordPress themes.
- Scalability: React can easily handle large-scale projects and integrate with other libraries.
Step 1. Setting Up A WordPress Site
For implementing React in WordPress with Headless CMS, the first step will be to set up a WordPress site as it will provide all the relevant sources to create front-end React applications .
Get started with using git for installing the zip file of the WP-Rest API plugin and then upload that zip folder within your WordPress plugins folder.
As soon as the file gets uploaded, allow the WordPress Rest API into your ReactJS WordPress website by activating the plugin.
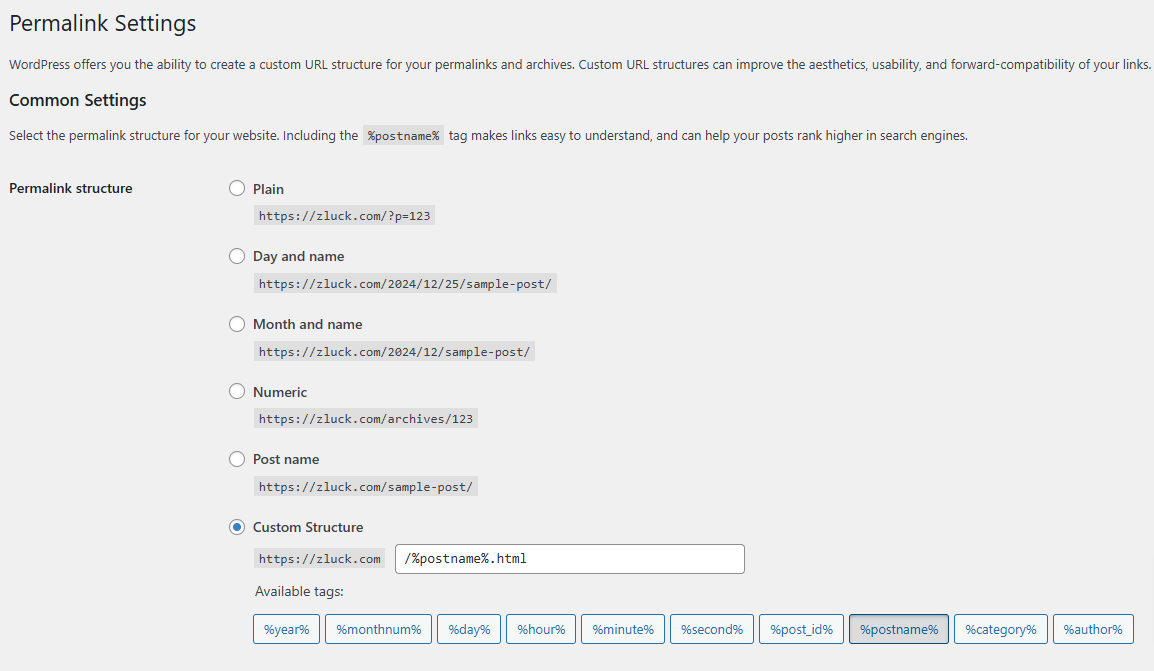
Now, head toward the Settings → Permalinks and choose either Post name or Custom Structure.
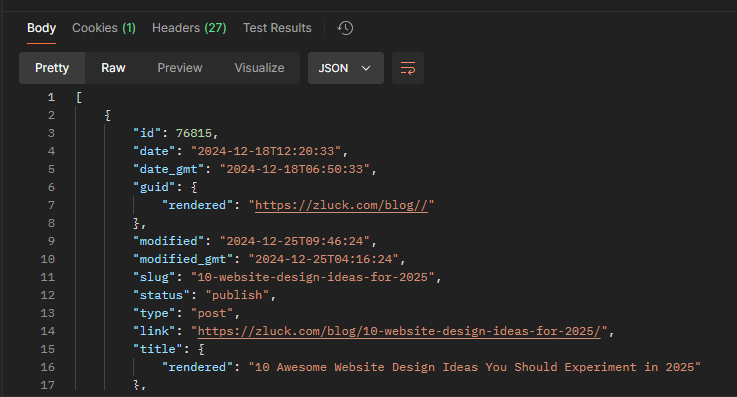
As we are functioning with API calls, therefore, install the chrome extension for Postman. When you get into the Postman then type the URL in the following manner:
https://example.com/wp-json/wp/v2/posts
This URL will help you get data into your WordPress site.
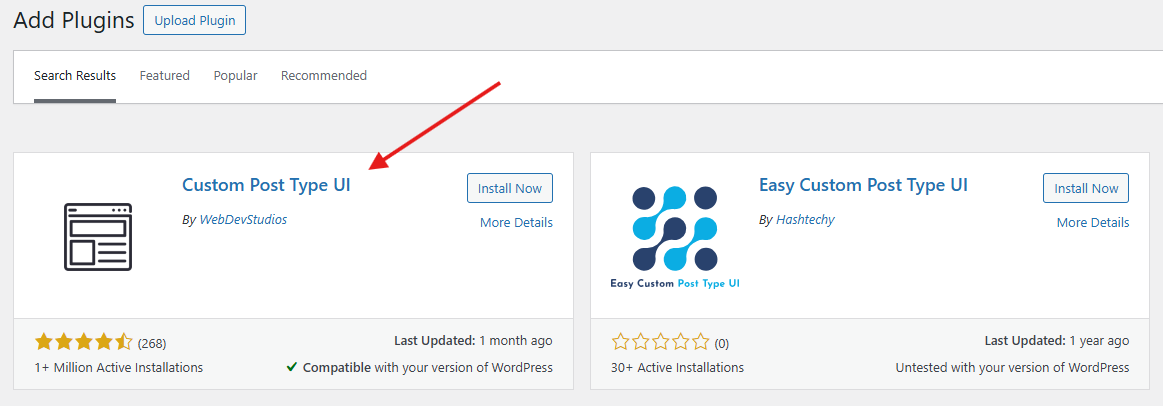
Custom Post Type UI Plugin
This user-friendly tool makes it easy to set up and manage custom post types. These custom posts will be essential when you integrate WordPress with React in the next step, as they’ll allow you to fetch and display specific content tailored to your application.
Now, Install and activate the plugin and start adding a new post type. To help you understand it, we will show you how to create a custom post type for Movies.
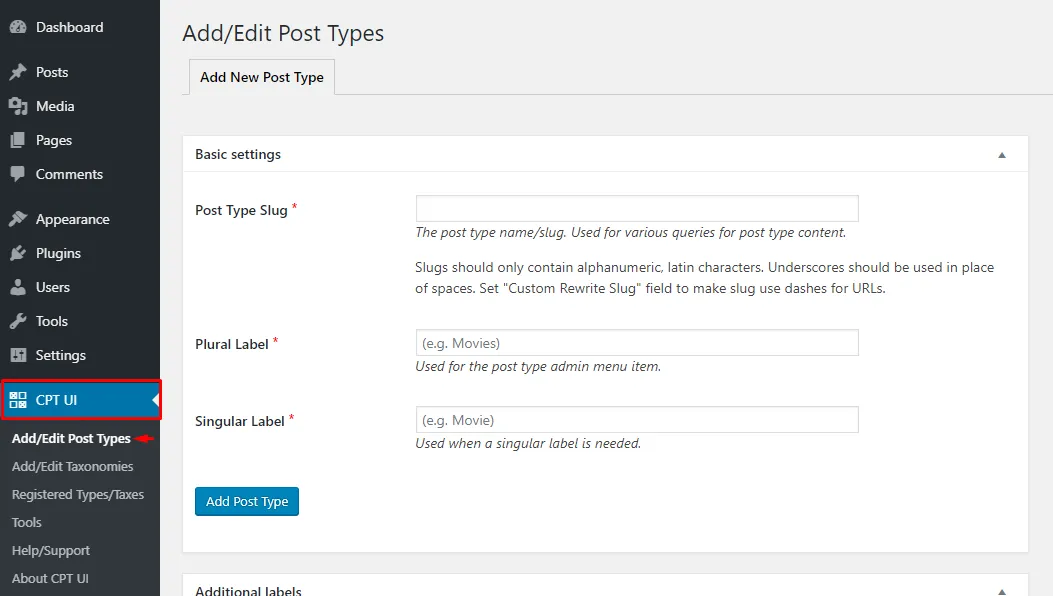
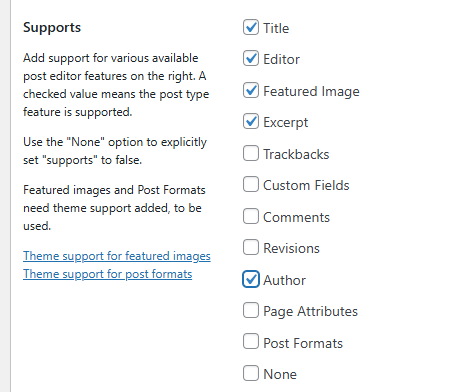
First, write the name of the custom post in the Post Type Slug. If you want to use Headless WordPress, make sure to set True in the Show in the REST API option.

Click to all the options for getting the information you want to fetch from the REST API.
As soon as you click on save, you will come across a new option that has popped up in the sidebar—click on that option to add a new Movie into your custom post type.
Click on the URL inside the Postman to check whether the data is available through API.
Now, the URL will show up like https://exampe.com/wp-json/wp/v2/movies
So now, you can include further fields such as Publisher by using ACF and ACF into RestAPI plugins.
Install and activate both the plugins.
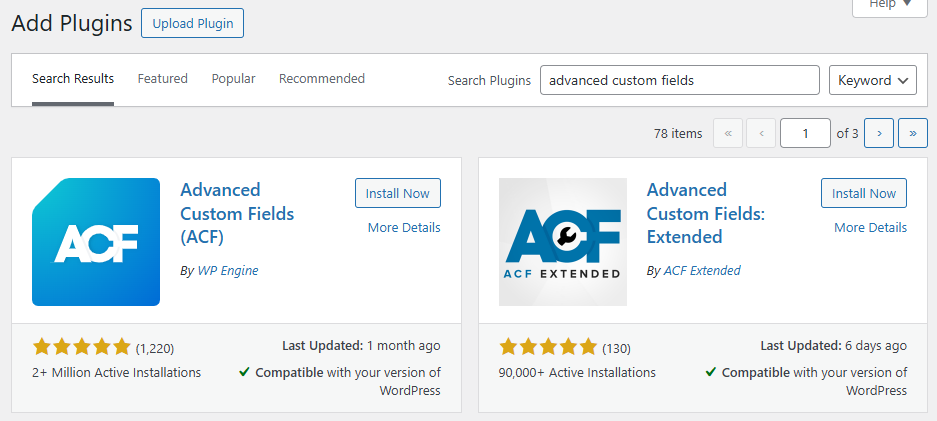
Now, we have to download the ACF REST API plugin also.
Make sure to select the desired post type from the list. After that, click on Publish.
You will come across a new field inside your custom post type. That’s all that you need to set up React with WordPress for sending data to ReactJS web application.
Step 2. Getting Started With React
For setting up the React application, the following requirements are necessary to be installed on the computer.
- NodeJS & NPM.
- Text Editor such as Sublime or Visual Studio Code
- Git for version controlling (Optional)
As soon as you install all the dependencies, Create the project with ReactJS WordPress by opening up the command line typing the following code
npx create-react-app frontendNow, the app will be created, change the directory to the app folder, and run the following command to install the Axios package for API calls.
npm i axiosThen, click on the folder that is inside your favorite text editor.
Launch the application by running the command npm start.
Now, we are ready to create a web application with headless WordPress ReactJS.
Create a new folder ‘components’ inside the src folder, and inside the ‘components’ folder, create a new file ‘Books.js’. It’s an important part of Headless WordPress With React.
2.1: Rendering Post Data On ReactJS
import React, { useEffect, useState } from 'react';
import Card from '@material-ui/core/Card';
import CardContent from '@material-ui/core/CardContent';
import Typography from '@material-ui/core/Typography';
import Grid from '@material-ui/core/Grid';

export default function Posts() {
    const [posts, setPosts] = useState([]);
    useEffect(() => {
        async function loadPosts() {
            const response = await fetch('/wp-json/wp/v2/posts');
            if(!response.ok) {
                // oups! something went wrong
                return;
            }

            const posts = await response.json();
            setPosts(posts);
        }

        loadPosts();
   }, [])
  return (
    <Grid container spacing={2}>
      {posts.map((post, index) => (
      <Grid item xs={4} key={index}>
        <Card>
           <CardContent>
                <Typography
                    color="textSecondary"
                    gutterBottom
                    dangerouslySetInnerHTML={{__html: post.title.rendered}} />
                <Typography
                    variant="body2"
                    component="p"
                    dangerouslySetInnerHTML={{__html: post.content.rendered}} />
            </CardContent>
        </Card>
      </Grid>
     ))}
    </Grid>
 );
}
You’ll notice I used useEffect and useState, two of React’s Hooks.
First, useState is used to declare the array of posts and provide a callback to update it.
Then useEffect allows running the fetch code when the component is mounted.
Finally, to render a list of posts, you can “map” over the posts array and return components for each one of them. However, there are a few quirks related to how useEffect works:
- The callback cannot return a promise, so an async function cannot be passed directly to useEffect.
- An empty array must be passed to useEffect to make it run only once. This tells React that this effect doesn’t depend on any value.
2.2 Creating a custom React Hook
To simplify this, you can create your own React Hook “useFetch” (in ./useFetch.js):
import { useEffect, useState } from 'react';

export default function useFetch(url) {
    const [data, setData] = useState(null);
    useEffect(() => {
        async function loadData() {
            const response = await fetch(url);
            if(!response.ok) {
                // oups! something went wrong
                return;
            }

            const posts = await response.json();
            setData(posts);
        }

        loadData();
    }, [url]);
    return data;
}
I extracted the previous Hooks into a function and told useEffect to run again when the fetched URL changes. This is essentially how you can create any custom React Hooks!
This one can be used like this:
export default function Posts() {
    const posts = useFetch('http://localhost/wp-json/wp/v2/posts');
  return (
    <Grid container spacing={2}>
      {posts && posts.map((post, index) => (
      <Grid item xs={4} key={index}>
        <!-- this code is unchanged -->
      </Grid>
      ))}
    </Grid>
  );
}
3. Adding custom post type to WP Rest API
Now that we have some basic React code to query WP’s REST API let’s add a new data type!
You can use many WP functions to register what’s needed. All of which will go in a new PHP file in wp-content/plugins/my_plugin.php.
Starting with meta comments like this:
<?php
/**
 * @package Sample_Plugin
 * @version 1.0.0
 */
/*
Plugin Name: Sample Plugin
Plugin URI: http://example.com/
Description: The beginning of an awesome plugin
Author: Me
Version: 1.0.0
Author URI: http://example.com/
*/
For the sake of this demo, I decided to create a course type that would represent an online course from a learning platform.
I could never explain all available options while creating custom post types. To do so, you could dive into WP documentation or use a generator.
Whichever way you prefer, here’s a minimal version of my course type declaration, I’ll then explain the relevant parts:
function generate_course_type() {
    $labels = array(
        'name'                  => 'Courses',
        'singular_name'         => 'Course',
    );
    $args = array(
        'label'                 => 'Course',
        'labels'                => $labels,
        'supports'              => array( 'title', 'editor', 'custom-fields' ),
        'taxonomies'            => array( 'category', 'post_tag' ),
        'hierarchical'          => false,
        'public'                => true,
        'capability_type'       => 'page',
        'show_in_rest'          => true,
        'rest_base'             => 'courses',
    );
    register_post_type( 'course_type', $args );
}
add_action( 'init', 'generate_course_type', 0 );-
generate_course_type is a function that will run when WP initialize, because it’s attached to init through the add_action call. Most customizations in WordPress get attached to actions like this.
-
In that function, the custom type gets registered with register_post_type. This is what defines how the type is handled in WP both for the admin and the REST API.
-
The relevant parameters are show_in_rest to allow fetch the courses from the REST API and rest_base that set the url path for courses to be /wp-json/wp/v2/courses
So now, the plugin can be activated in WP’s admin and then some courses can be added.
With the help of our useFetch Hook, getting the list of courses in a React component is simple:
export default function Courses() {
    const courses = useFetch('http://localhost/wp-json/wp/v2/courses');
  return (
    <List component="nav" aria-label="main mailbox folders">
        {courses && courses.map((course, index) => (
        <ListItem key={index}>
          <ListItemText primary={course.title.rendered} />
        </ListItem>
        ))}
    </List>
  );
}
4. Further customizations
I know that most use cases will be more complex than what we just did, but it sets the foundations for a WP & React powered web app. Plus, it helps us understand how the WP REST API works.
To spice things up a little, I made these courses buyable for signed-in users. So a price field must be exposed in the API. To do this, there are two approaches:
-
use post meta: the cleaner way would be to do it from the perspective a plugin, but it requires slightly more work to implement the meta box for editing these fields.
-
use custom fields: these can be added directly from the editor but we need to tweak to the REST API to expose them.
Here’s how to declare a post meta for the courses:
function generate_course_type() {
    // ... previous code from generate_course_type

    $meta_args = array(
        'type'         => 'number',
        'description'  => 'The price of a course.',
        'single'       => true,
        'show_in_rest' => true,
    );
    register_post_meta( 'course_type', 'price', $meta_args );
}
By setting show_in_rest to true, it will be exposed automatically to the REST API.
Alternatively, custom fields created in WP’s admin interface can be exposed to the REST API by using register_rest_field:
function get_price_field($object, $field_name, $value) {
    return floatval(get_post_meta($object['id'])[$field_name][0]);
}

function register_course_price_in_api() {
    register_rest_field('course_type', 'price', array(
        'get_callback' => 'get_price_field',
        'update_callback' => null,
        'schema' => null,
    ));
}

add_action( 'rest_api_init', 'register_course_price_in_api' );
Here we declare the get callback for the price field and in that callback, we retrieve and format that field from the post meta.
Querying the REST API returns a payload like this one:
[
    {
        "id": 72,
        "date": "2020-03-11T06:31:52",
        "slug": "markething-madness-with-frank",
        "status": "publish",
        "type": "course_type",
        "title": {
            "rendered": "Markething Madness with Frank"
        },
        "content": {
            "rendered": "",
            "protected": false
        },
        "price": 75.99,
        "_links": {
            // ...
        }
        // ...
    },
    // ...
]
With the price being available in the REST API, e-commerce functionalities can be added to the app!
I won’t go into the details of configuring Snipcart in this demo. However, if you’re interested, the GitHub repo shows an example of using Snipcart’s API with React Hooks.
Conclusions:
WordPress has evolved significantly, making its REST API easier and more enjoyable to configure, empowering developers to pair its robust content management capabilities with any frontend stack. Combining WordPress as a headless CMS with React unlocks dynamic possibilities, especially with React Hooks simplifying complex logic. Interestingly, WordPress now integrates seamlessly with JAMstack, even serving as a static site generator using tools like Strattic or WP2Static—stay tuned for more on this!